Test & Measurement
What Is a Megger Insulation Tester? A 6-Step Checklist on How to Use It and Buy It Smarter
-
Step 1: Understand What It Measures Before You Touch the Price Tag
-
Step 2: Read the Spec Table, Not the Product Photo
-
Step 3: Use It Safely — the Sequence We Standardized
-
Step 4: Interpret the Number with a Baseline, Not a Panic
-
Step 5: Match the Unit to Your Real Workload
-
Step 6: Price the Lifecycle, Not the Sticker
-
Common Mistakes That Turn a Good Tester into a Bad Purchase
If you've been handed the job of buying electrical test equipment but never trained as an electrician, this checklist is for you. I've spent six years managing instrument procurement for a mid-sized manufacturing plant—roughly $180,000 a year across test gear, lab equipment, and consumables, spread across 30-plus vendors. Insulation resistance testers, the things everyone calls 'meggers,' were one of the first purchases I had to figure out the hard way.
Here's the thing: a megger insulation tester isn't complicated once you separate the myths from the method. This is the six-step checklist I run through every time—what it is, how to use it, and where most buyers waste money.
Step 1: Understand What It Measures Before You Touch the Price Tag
So what is a megger insulation tester? It's a handheld meter that applies a DC voltage to a conductor, measures the leakage current flowing through the insulation, and shows the result as resistance in megohms. High insulation resistance means the insulation is still doing its job. Low resistance usually points to moisture, physical damage, or age breaking the protection down.
The name itself is a history lesson. Megger is the company that built the first insulation resistance tester back in 1889, and the brand name became the generic term, the same way Kleenex and Xerox did. So when a contractor says 'megger it,' they're not naming a product. They're telling someone to run an insulation resistance test.
The big difference between a megger insulation tester and an ordinary multimeter: a multimeter uses a low voltage to measure resistance, but a megger pushes 250V, 500V, 1000V, or more across the insulation. That higher voltage is what makes the test meaningful. It stresses the insulation in a way a multimeter simply can't.
Quick checkpoint: if you can't explain that difference in one sentence, keep reading before you hand over a purchase order. I've watched buyers approve a multimeter because it was cheaper and call it a megger. Those are different tools for different jobs.
Step 2: Read the Spec Table, Not the Product Photo
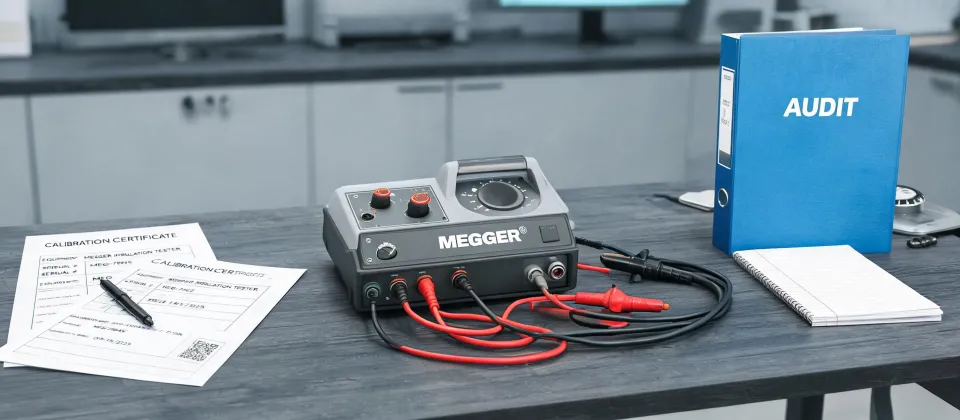
I'll be honest—the first time I searched for a megger insulation resistance tester image, I compared case colors and button layouts. The photos all look similar: a yellow or red handheld box with a rotary dial and two test leads. You can't judge the purchase from the picture.
Here's what you actually need to evaluate:
- Test voltage settings. At minimum, you want 500V and 1000V selections. If you work on high-voltage switchgear, you'll need 5kV or higher.
- Resistance measurement range. Look for at least 2,000 MΩ. The better units reach 10,000 MΩ or more.
- CAT safety rating. This one is non-negotiable. Under IEC 61010, a meter used on industrial panels should be rated CAT III 600V or CAT IV 300V. That rating is your safety margin, not a marketing bullet.
- Environmental rating. If the unit will live outdoors or in a dusty plant, IP54 or better is worth hunting for.
Why does this matter? Because every 'megger' in that image search will look roughly the same, but the spec tables will not. I've compared testers that appeared identical in the product gallery and found 300% price gaps once the CAT rating, temperature range, and accessory kits were accounted for.
Step 3: Use It Safely — the Sequence We Standardized
Now for the part that usually doesn't get written down: megger insulation tester how to use. Here's the sequence I've had our team follow for years. It's not clever. That's the point.
- De-energize the equipment. Lock it out and tag it per OSHA lockout/tagout rules, then verify with a separate voltmeter that nothing is live.
- Discharge the circuit. Briefly ground each conductor to bleed off stored charge. This step gets skipped more than any other, and it's one of the most dangerous.
- Connect the leads. The black or green lead goes to ground. The red lead goes to the conductor under test.
- Select the test voltage. A 480V motor gets tested at 500V. A higher voltage circuit gets tested at the next standard setting above its rating. Match the voltage to the equipment nameplate.
- Press and hold the test button. Wait for the reading to stabilize—around 60 seconds is the standard for an insulation absorption reading.
- Record the value, along with temperature and humidity. Both swing insulation readings more than people expect.
- Discharge the circuit again before removing the leads.
Field notes from our own mistakes: a bad test lead will lie to you. Cracked or damp leads leak current and drag every reading downward. Inspect them before each use. And don't test a cold, wet motor and panic when it reads low—moisture is a poor insulator. Bring the equipment indoors, let it dry, and retest.
Step 4: Interpret the Number with a Baseline, Not a Panic
What counts as a pass? The practical rule comes from IEEE 43, the standard for insulation-resistance testing: minimum insulation resistance of about 1 MΩ per kilovolt of rated voltage, with margin added on top. For a 480V motor, that works out to roughly 1.5 MΩ. Below that, I want to know why.
But a single reading is almost useless. Two readings taken six months apart tell you whether the insulation is degrading. A motor that drops from 50 MΩ to 10 MΩ over a year is heading for trouble even though 10 MΩ still passes the minimum. The trend beats the absolute number, more often than not.
This is where I changed my mind from what I'd read early on. Conventional wisdom said to buy as much test voltage and range as you could afford, because you 'never knew what you'd need.' In practice, I found the opposite. Our 5kV megger comes out of its case maybe once a year. The 1000V handheld does the real work every week. It took me three years and roughly fifteen purchase orders to understand that the best insulation tester is a functional match for your plant, not a spec-sheet flex.
That mindset is a leftover from the analog era, when a 1000V megger could only test at 1000V and you genuinely needed a separate unit for every voltage class. Modern digital testers have selectable voltages, so the 'buy extra range just in case' logic doesn't hold the way it used to.
Step 5: Match the Unit to Your Real Workload
Before you compare brands, make a list of every piece of equipment you'll actually test. That gives you your maximum test voltage. For our plant, it's 1000V—motors, cabling, and distribution panels at 480V and below. We rarely touch the 5kV unit except for one annual 4160V motor survey.
Then ask five questions:
- Who will use it? A plant electrician working in tight panels, or an engineer at a bench?
- How often? Weekly field use means a rugged case and efficient battery matter more than memory size.
- Do we need data logging? If you're trending insulation values, go digital with onboard storage.
- Can we source local calibration? A meter that needs annual ISO 17025 calibration is a logistics cost, not a footnote.
- Are replacement leads standard? Units with proprietary leads turn a $50 replacement into a $150 invoice.
And if you only need high-voltage capability for one project, rent it. We paid $500 for a week-long rental of a 10kV unit during a transformer acceptance test. Buying that unit for $6,000 to use once would have been tough to defend to finance.
Step 6: Price the Lifecycle, Not the Sticker
Now we get to the part my role is known for. In Q1 2025, I collected quotes for a handheld insulation tester from four vendors. Similar spec tables. Sticker prices from $240 to $1,100. My first instinct was to take the $240 unit and move on. Then I ran the total cost, the same way I would for any test instrument:
- Calibration: an ISO 17025 calibration for an insulation tester typically runs $150–$400, depending on range and turnaround.
- Accessories: replacement leads cost $50–$90. Proprietary lead sets run closer to double.
- Durability: one of the trial units cracked its display case after a 5-foot drop. That warranty claim cost us three weeks of downtime.
- Batteries: the cheap unit burned through six AA cells in four days of field work. The pricier unit ran all month on four.
The $240 tester cost about $600 to keep operational in year one. The $890 unit cost about $950 all in. The sticker price lied; the lifecycle did not.
I apply that same logic beyond electrical gear. When we sourced a centrifuge 5424 for the lab, the base price looked fair, then the rotor, tubes, and adapters added nearly a third on top. The titrator we bought for water chemistry was worse—the electrode, burette, and pump seals are ongoing consumables that dwarf the original quote over five years. The rule is identical for a centrifuge 5424, a titrator, or an insulation tester: if you're not pricing the lifecycle, you're just comparing opening bids.
Common Mistakes That Turn a Good Tester into a Bad Purchase
Keep these as guardrails:
- Testing energized equipment. A megger applies its own voltage. Testing live circuits is how people get hurt. De-energize first, every time.
- Using the highest voltage setting on everything. Too much test voltage can damage windings and electronics rated for less. Match the setting to the nameplate.
- Skipping the post-test discharge. It's a shock risk, and it corrupts your next reading as well.
- Buying more range than you'll ever use. A 5kV unit looks impressive in its case but expensive on the calibration invoice. Buy the range you have a reason for.
- Ignoring the calibration reminder. On a meter this sensitive, an out-of-calibration reading is worse than no reading—it sends you chasing failures that aren't there.
If you remember one thing: know what you're measuring, pick the lowest test voltage that does the job safely, and price the whole life cycle. Prices here are as of early 2025; verify current rates with your suppliers.

Marcus Feld
Marcus Feld is an electrical test and measurement analyst specializing in multimeters, oscilloscopes, clamp meters, insulation testers, spectrum analyzers, and data loggers. He applies IEC 61010-2-030 and IEC 61010-031 concepts while examining measurement category, bandwidth, true-RMS response, input loading, and stated uncertainty. His work helps maintenance engineers and test teams choose safe instruments with performance suited to the signals and environments they actually measure.