Test & Measurement
Test Equipment Buying and Use: A 5-Step Checklist from an Admin Buyer's Perspective
-
Step 1: Match the Insulation Tester to Your Team's Actual Voltage Needs
-
Step 2: Check and Replace the Multimeter Fuse Without Regret
-
Step 3: Use a Thermal Imaging Camera (Like the E4) the Right Way
-
Step 4: How to Use a Tektronix Oscilloscope (Without Panicking)
-
Step 5: Build a Simple Maintenance and Training Checklist
-
Common Mistakes to Avoid
If you're the person at your company who gets asked to order “an insulation tester” or “a thermal camera” and you don't have an engineering degree, this guide is for you. I've been managing equipment purchases for about 80 engineers for five years, and I still don't know everything. But I've learned a process that keeps me from wasting money and keeps the engineers happy.
Here's the short version: you need five steps.
Step 1: Match the Insulation Tester to Your Team's Actual Voltage Needs
Don't start with a brand. Start with the highest voltage your team will be working on. For most industrial maintenance work, that's 600 volts. A 1000V insulation tester will cover that comfortably. For example, IEEE Std 43 recommends a 500V DC test for motor windings rated under 1000V, so a 1000V tester gives you the right range and some headroom.
I learned this the hard way. In 2020, our senior engineer said “get the best we can buy.” So I ordered a heavy 5kV insulation tester. It was overkill. The 5kV range confused the junior techs, and the price tag made my finance manager wince. We ended up standardizing on the Megger MIT400/2—a versatile instrument that gives us the voltages we actually use, and it's easier to carry around.
Before you order, check these three things:
- Test voltage range: 250V, 500V, 1000V, or more. Most preventive maintenance tasks don't need more than 1000V.
- Measurement range: Insulation resistance readings should go to at least 10 GΩ, and ideally more.
- Safety category: CAT III or CAT IV if the tester will be connected to supply panels.
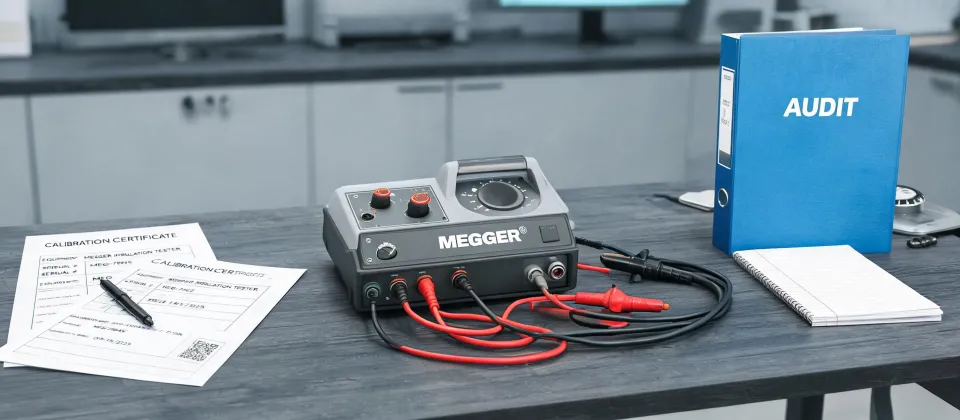
Here's a thing I almost always forget: calibration. Ask the vendor if the instrument ships with a calibration certificate. It saves you a headache later when the quality audit comes around.
An informed customer asks better questions and makes faster decisions. I'd rather spend 10 minutes explaining specs than deal with a wrong $800 meter later.
Step 2: Check and Replace the Multimeter Fuse Without Regret
Let me tell you about the day I cost our company $360 because I skipped a fuse check. We have a Fluke 115 multimeter that started reading current incorrectly. I knew the fuse might be blown—there were signs—but I thought, “what are the odds? It's just a meter.” That was the one time it mattered. The meter failed during a critical reading, went to calibration, and the service center found the blown fuse. They charged us for a replacement fuse, the calibration, and the embarrassment.
Checking a fuse takes less than a minute:
- Turn the meter off and disconnect all test leads.
- Open the battery door (the fuse is usually underneath it).
- Pop the fuse out and look at the wire inside. If it's broken or dark, replace it.
- Use exactly the same type and rating. Check the manual or the old fuse itself.
Don't use a cheap or lower-rated fuse. It can damage the meter and create a fire risk. Keep spare fuses in the drawer, and show your team how to check them. This tiny habit saves you money and avoids equipment downtime.
Step 3: Use a Thermal Imaging Camera (Like the E4) the Right Way
Thermal cameras are powerful but easy to misuse. I've seen colleagues point the E4 thermal imaging camera at a panel, take a photo, and call it a day. Then they wonder why the temperature readings look weird. Almost always, it's because they skipped the emissivity setting.
- Set the emissivity first. For electrical panels, use about 0.95. For shiny metal, raise it or use a piece of black tape as a reference.
- Hold steady and let it focus. Wait for the autofocus to lock before you snap the image.
- Back up a little. Get the whole component in frame—not just a tiny spot. A wide view helps you see the pattern of heat.
- Remember the palette. White or yellow means hot; purple and dark blue mean cold. When you're rushing, it's easy to misread.
Real talk: the best investment isn't a fancier camera. It's a 20-minute training session on how to interpret thermal images. In Q3 2024, after our team learned to adjust emissivity, we found a loose connection that had been hiding for months. The camera was fine all along. The user just wasn't using it right.
Step 4: How to Use a Tektronix Oscilloscope (Without Panicking)
When the first Tektronix oscilloscope arrived at our office, I felt like I was staring at a spaceship. But the fundamentals are simpler than they look. I give every new hire this quick-start routine:
- Connect the probe to Channel 1 and the ground clip to a solid earth ground.
- Set the vertical scale (volts per division) to a reasonable starting point. If you're not sure, start at 10V/div.
- Set the horizontal scale (time per division) based on your signal. A 1 kHz waveform? Try 0.5 ms/div.
- Adjust the trigger level until the waveform stops rolling. This is the step everyone skips, and it's why the signal looks like a mess.
- Use the “Auto Set” button only as a starting point, then fine-tune manually.
Here's the thing: the trigger is usually the problem, not the scope. I've fixed more confused looks with 30 seconds of trigger adjustment than with any other tip.
Step 5: Build a Simple Maintenance and Training Checklist
The most ignored step is also the most important. After any new test instrument arrives, do these four things:
- Add it to your calibration schedule. Put the due date on your calendar now.
- Order spare fuses and accessories before you need them.
- Schedule a 30-minute training session with the people who'll use it most.
- Save the user manual to a shared drive. Paper manuals get lost.
In 2024, this checklist saved us around $400 when one of our techs recognized a blown fuse in a multimeter before it could fail on site. That's exactly why I'm a big believer in customer education: if the buyer knows what to ask and the user knows what to check, the whole process gets easier.
Common Mistakes to Avoid
- Don't use an insulation tester on a live circuit. It's not a multimeter.
- Don't replace a multimeter fuse with a hardware-store fuse. Use the specified high-energy type.
- Don't assume a thermal camera battery is charged before field day. I've made that mistake.
- Don't store oscilloscope probes loosely in a drawer. Coil them gently and keep the tips clean.
At the end, buying test equipment isn't about being the smartest engineer in the room. It's about asking the right questions, reading the names on the spec sheet, and making sure the people who use the tools know at least the basics. That's how you get the most value out of your test instruments—and keep the budget reviewers happy.

Marcus Feld
Marcus Feld is an electrical test and measurement analyst specializing in multimeters, oscilloscopes, clamp meters, insulation testers, spectrum analyzers, and data loggers. He applies IEC 61010-2-030 and IEC 61010-031 concepts while examining measurement category, bandwidth, true-RMS response, input loading, and stated uncertainty. His work helps maintenance engineers and test teams choose safe instruments with performance suited to the signals and environments they actually measure.