Test & Measurement
I Won't Sign Off on a Measurement Until It Passes This Check First
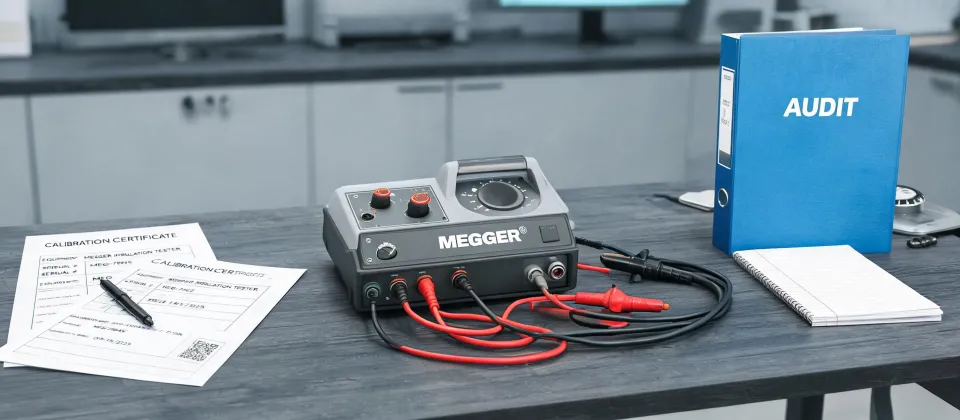
My rule is simple: I don't trust a digital display just because it is digital. I trust it after I have verified the instrument, the setup, and the operator's question. That is not paranoia; it is prevention.
I am a quality and brand compliance manager at an instrumentation supply company. I review every product spec sheet and test setup before it reaches a customer—roughly 200 unique items per year. Maybe 180, I'd have to check the system. As of January 2025, our quality log shows a 7% first-delivery rejection rate in the last year. I do not enjoy rejecting things. I do it because the cost of not rejecting them is much higher than the cost of the rejection.
Most instrument problems are not instrument problems. They are verification problems. And that is good news, because verification is something we can control.
The expensive lesson that changed my process
When I first started managing quality, I assumed the safest path was to buy reputable instruments and call it done. I was wrong. In our Q1 2024 quality audit, we traced the three biggest rework events back to verification gaps, not equipment failures.
Example: a batch of 40 CO2 sensors was installed in a building management system. The readings looked stable, and the certificates looked good. Then a routine calibration check found eight sensors with offsets above 75 ppm at the 1,000 ppm reference. These were not cheap 'bad' sensors. They had drifted since their last verification, and nobody had checked. The result was a $22,000 redo and a delayed launch. It came from a check we could have done in five minutes.
Everything I had read about quality said the brand name is the best predictor. My experience with hundreds of shipments says the real predictor is whether someone verified the instrument before use. (Not that brands don't matter—they do. They just don't replace verification.)
Know the difference between a multimeter and a megger
If you search for 'megger,' you will see a company, a type of instrument, and a verb. It is no wonder people get confused. The phrase 'multimeter megger' gets searched because someone hopes one box can do both. It cannot, not reliably.
Let me define it simply. A multimeter measures voltage, current, and resistance. An insulation resistance tester—often called a megger—applies a high DC voltage to measure how well insulation resists leakage. The relationship between megger and insulation tester is this: Megger is the brand that made the test famous, and insulation tester is the generic term. In the field, 'megger' and 'insulation tester' are used as synonyms.
A maintenance log I pulled during an audit showed a 500 V insulation test recorded with a multimeter set to resistance. The meter displayed 0.00, so the operator suspected a shorted conductor. The real issue was that a standard multimeter does not apply the high DC test voltage that an insulation test needs. It was a wrong-tool problem, not a bad-cable problem. That is the kind of confusion that costs hours of unnecessary troubleshooting.
Voltage checks: the same verification mindset
An engineer asked me recently how to use a Fluke multimeter to test voltage. The honest answer: the button presses are easy, but the mindset matters more. The same steps apply to any multimeter.
- Set the dial to AC or DC voltage, and start with a range higher than the voltage you expect.
- Connect the black lead to COM and the red lead to VΩ.
- Touch the probes to the test points and wait for the reading to stabilize.
- Ask whether the stable reading makes sense for the circuit.
Notice that I didn't mention the brand in that list. A Fluke multimeter is a common choice in our shop, but the verification steps are exactly the same on any meter. The brand name does not remove the need to check the settings.
That last step is the one I see skipped. A reading of 12 V on a circuit labeled 230 V is not a number to record. It is a clue to investigate. A good measurement is not just a number; it is a number that you understand.
Use the right tool to see failure before it happens
Prevention also means using tools that catch hidden defects. My favorite example is the pico microscope. It looks like a toy, but it catches things that functional testing misses. Before we approve a PCB assembly for stress testing, we inspect each board under a pico microscope. In one batch of 200 boards, it found six hairline cracks in connector pins. Those boards passed every electrical test, but they would likely have failed months later in a customer's machine. The inspection took about 40 minutes. The replacement cost would have been far higher.
A CO2 sensor deserves the same respect. A CO2 sensor with an unverified offset can create false alarms, missed ventilation warnings, and wasted time. Checking it against a reference gas takes minutes. Waiting to find out it drifted by 75 ppm takes weeks. In my experience, those weeks are worse.
The pushback I hear every week
'We don't have time to verify everything.' That sentence shows up at least once a month in our planning meetings. I understand it. I don't want to turn a five-minute test into a two-hour ritual. But you don't have to treat every measurement the same way. You prioritize by risk.
In my own decision-making, I run a quick trade-off. The upside of skipping a verification step is maybe fifteen minutes. The risk is a wrong reading that leads to a false pass, a failed audit, or a return visit. When I put it that way, the choice is embarrassingly easy.
Some verification is cheap and high-yield: check the calibration sticker, confirm the instrument's range, zero the meter, verify a CO2 sensor against a reference, inspect a PCB under a pico microscope for solder bridges. These take minutes, not days. The alternative is expensive and slow.
I built a 12-point checklist after my third rework event. I called it 'Pre-Flight' because that is what it is. It has saved us an estimated $8,000 in potential rework. Maybe $8,000 or $9,000—I would have to add it up. The exact number is less important than the pattern: a list you can follow in minutes prevents the failure you cannot fix in days.
Verification is the cheapest insurance
I still make mistakes. I still get the urge to trust a known brand and skip the pre-check. But after every costly redo I have been part of, the cause traces back to a simple thing: a number was accepted before it was verified. The tools are not the weak link. The check is.
So don't only ask what instrument to buy. Ask what verification it will need before its readings count. That shift is the difference between catching a problem and being caught by it. It is the difference between owning a megger and knowing how to use it well. Five minutes of verification beats five days of correction.

Marcus Feld
Marcus Feld is an electrical test and measurement analyst specializing in multimeters, oscilloscopes, clamp meters, insulation testers, spectrum analyzers, and data loggers. He applies IEC 61010-2-030 and IEC 61010-031 concepts while examining measurement category, bandwidth, true-RMS response, input loading, and stated uncertainty. His work helps maintenance engineers and test teams choose safe instruments with performance suited to the signals and environments they actually measure.