Test & Measurement
Test Equipment Verification Checklist: 7 Checks I Run Before Approving Any Instrument
-
The 7-Point Verification Checklist
-
1. Verify calibration status before you look at anything else
-
2. Functionally test megger 2.5kV insulation testers on a known load
-
3. Check megger clamp meters on a known current loop
-
4. Don't skip the "cheap" 101 multimeter
-
5. For Raman microscope rentals, inspect like it's a purchase
-
6. Do a quick gravimetric check on pipettes (yes, including Eppendorf)
-
7. Calculate total cost of ownership before the final sign-off
-
1. Verify calibration status before you look at anything else
-
Common Mistakes I Still See
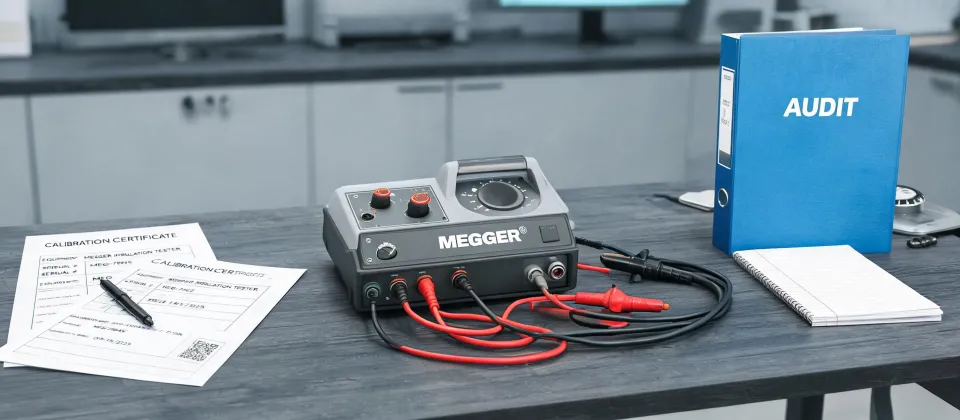
If you're the person who signs off on test equipment—whether it's a megger 2.5kV insulation tester for the maintenance crew, a megger clamp meter for the field team, or a Raman microscope rental for a six-week project—this checklist is for you. It's basically the same verification checklist I run at incoming inspection, and it's kept me from accepting more than a few instruments I would have regretted.
The lowest quote can be the most expensive instrument you ever buy.
Quick context: I'm the quality compliance manager at a test and measurement instrument supplier. I review roughly 2,000 instruments a year—new, used, and rental returns. In our Q1 2024 quality audit, we rejected about 12% of first deliveries due to calibration drift, damaged leads, or missing documentation. Not because the vendors were bad, but because verification was rushed. The seven checks below take about 20 minutes per instrument once you've done them a few times. That 20 minutes has saved us from at least one $22,000 redo.
One thing before the list: I'm going to keep referring to total cost of ownership (TCO), not sticker price. The instrument that's cheapest today is often the most expensive by the time calibration, downtime, and repair lead time are added in. So every check here is as much about the costs after the invoice as it is about the instrument itself.
The 7-Point Verification Checklist
1. Verify calibration status before you look at anything else
The first check on every instrument—megger insulation tester, clamp meter, benchtop multimeter, pipette—is the calibration label and certificate. Not just "is there a sticker," but:
- Is the calibration date within the manufacturer's recommended interval? (Most electrical instruments need it annually; pipettes every 3–6 months depending on usage.)
- Is the certificate traceable to a national standard (NIST or ISO/IEC 17025)?
- Does the certificate's serial number match the instrument's serial number? You'd be surprised how often they don't match.
Honestly, this is where most of our rejections happen. A vendor once shipped a "calibrated" 101 multimeter with a certificate from an instrument that had been retired two years earlier. The sticker looked fine; the documentation wasn't. That's a classic rookie mistake—I made it myself in my first year, and it cost us a customer complaint that took three weeks to resolve.
2. Functionally test megger 2.5kV insulation testers on a known load
A calibration certificate tells you the instrument was accurate on the day it was tested. It doesn't tell you the high-voltage output actually works today. For a megger 2.5kV insulation tester, I run a quick functional check:
- Set the tester to 2500V and connect it to a known high-value resistor (e.g., 1 GΩ ±1%).
- Verify the displayed insulation resistance is within the tester's accuracy spec for that range.
- Repeat on a lower-value resistor (e.g., 100 MΩ) to confirm the tester measures across its range, not just at one point.
- Check the test leads for cracks or loose banana plugs. Bad leads cause intermittent readings that are impossible to diagnose in the field—which, honestly, is the most frustrating part of insulation testing failures.
This takes three minutes. Skip it, and you're trusting a $2,000 instrument to a piece of paper. The cost of a wrong reading on a 2.5kV insulation test can be a failed audit or, worse, a safety incident. That's a TCO line item nobody puts on the spreadsheet.
3. Check megger clamp meters on a known current loop
Clamp meters are so handy that we tend to ignore them. But the jaw mechanism wears, and accuracy drifts. For megger clamp meters, I do:
- Check the jaw faces for dirt, scratches, or debris. Even a small gap changes the magnetic coupling and skews the reading. Tip: close the jaw on a clean piece of paper and pull it out—if it drags, jaw tension is okay; if it slides freely, the jaws are loose.
- Clamp around a known current conductor—I use a calibrated loop with a 20A reference. Compare the clamp reading to the reference.
- Do the same at a low current (around 0.5A) because some clamp meters lose accuracy at the bottom of their range.
This is the check most people skip with clamp meters, because they assume the calibration sticker covers everything. It doesn't cover mechanical wear. We had a batch of clamp meters in 2023 that all read within spec on the bench but were 8–10% off on the meter loop—the jaw mechanics had loosened even though the electronics were fine. TCO lesson: a $25,000 downtime event caused by a bad reading makes a $150 calibration look like the bargain of the year.
4. Don't skip the "cheap" 101 multimeter
This one's actually easy to skip because the instrument is so inexpensive. A basic 101 multimeter is the tool technicians grab first, which means it gets knocked around the most. Before you approve it:
- Open the battery compartment and check for corrosion. Leaked batteries are the #1 cause of erratic readings, and a surprisingly common reason for "drive-by" returns.
- Check the fuse. A blown amp fuse makes the meter read correctly on voltage but fail on current, and most people don't test that until they're in the middle of a job.
- Do a basic voltage check against a known reference—I use a benchtop supply at 5.000V. The tolerance on a 101-grade meter is around ±1%, so it should read 4.95–5.05V.
The reasoning here is TCO, not cheapness. A $25 meter that's out of spec can cause a technician to chase a fault for half a day. That half-day costs more than the meter. So check the cheap ones too, because they're the ones most likely to be abused.
5. For Raman microscope rentals, inspect like it's a purchase
Rental equipment is a special case, and almost everyone overlooks it. The assumption is that the rental company "takes care of that." But I've seen rental Raman microscopes show up with misaligned optics, missing software dongles, and—my personal favorite—a calibration certificate that was actually for a different instrument. The rental contract said "premium system," the box had a different system inside. (Surprise, surprise.)
When you're evaluating a Raman microscope rental, add these to your checklist:
- Verify the instrument part number and serial number match the rental agreement.
- Run a quick alignment check using the manufacturer's built-in reference standard (most systems have one).
- Confirm the software license key or dongle is present and the software actually launches.
- Review the rental agreement's calibration clause: who is responsible if the instrument drifts during the rental? Does the agreement include a replacement unit or only a repair? Replacement matters if you're on a tight project deadline.
- Check insurance terms for accidental damage. This is a TCO trap: a cracked window on a $60,000 microscope is a bad day, but without insurance it's a catastrophic line item.
I've rented instruments that were perfect, and one Raman system that was dead on arrival. The replacement clause was the difference between a two-day delay and a four-week delay. The rental rate on the replacement-inclusive option was maybe 10% higher, but it saved the project timeline. That's the total cost of ownership in action.
6. Do a quick gravimetric check on pipettes (yes, including Eppendorf)
Pipette calibration questions come up constantly—especially "how to calibrate pipette Eppendorf" style searches. You don't need a full service lab for a verification. The gravimetric method, which is the basis of ISO 8655-6, is straightforward:
- Use a calibrated balance and a clean container of distilled water. The water should be between 20–25°C.
- Set the pipette to its nominal volume (e.g., 100 µL).
- Pipette the water onto the balance pan, record the mass, and repeat 10 times.
- Convert mass to volume using the density of water at your measured temperature (0.998 g/mL at 20°C).
- Compare the average and standard deviation to the manufacturer's specification. For a new Eppendorf pipette at 100 µL, that's typically within ±0.8 µL at the nominal volume, with a standard deviation under 0.3 µL.
This takes about 15 minutes. If the pipette is out of spec, send it for full calibration—don't try to adjust it yourself unless you have the manufacturer's service kit. I speak from experience: I once tried to "fix" a pipette with a screwdriver in my first year and made it 10x worse. That was a dumb mistake. The proper answer to "how to calibrate a pipette" is: verify with the gravimetric method, then send it to a qualified lab if it fails.
7. Calculate total cost of ownership before the final sign-off
Once the functional checks pass, run a TCO calculation before you approve the purchase or rental. The formula I use: purchase or rental price, plus calibration cost over the expected lifespan (e.g., $150/year × 5 years), plus expected repair cost (for megger equipment, I budget 2–4% of the purchase price annually), plus downtime cost if the instrument fails, plus accessories and consumables (test leads, fuses, batteries, pipette tips, software licenses). And if it's a rental, insurance and freight go on the list too—plus the cost of a backup unit if the rental fails.
This was accurate as of Q1 2025; prices and calibration rates change, so verify current numbers for your region. But the framework doesn't change. I've used it to reject a "cheaper" quote that would have added $800 in shipping and setup fees, and to approve a higher-priced option that included a loaner unit. The loaner unit alone was worth the price difference.
Common Mistakes I Still See
A few things that come up again and again:
- Trusting the calibration sticker without checking the certificate. Verification is the job; that's what "trust but verify" means.
- Skipping the functional test on high-voltage instruments. Calibration doesn't test the output circuit.
- Ignoring clamp meter jaw wear. The most accurate electronics can't compensate for a mechanical gap.
- Not checking rental terms for replacement and insurance. The rental quote that's 20% cheaper might not include a replacement unit, and you'll pay the difference in project delays.
- Assuming pipettes are fine because they look clean. Contamination and seal wear don't show on the outside.
This checklist is based on my experience at a mid-size B2B supplier with pretty predictable ordering patterns. If you're a seasonal business or a research lab with very different usage, your mileage may vary—especially on calibration intervals and rental terms. But the core principle stays the same: verify before you accept, and always count the total cost, not just the invoice.

Marcus Feld
Marcus Feld is an electrical test and measurement analyst specializing in multimeters, oscilloscopes, clamp meters, insulation testers, spectrum analyzers, and data loggers. He applies IEC 61010-2-030 and IEC 61010-031 concepts while examining measurement category, bandwidth, true-RMS response, input loading, and stated uncertainty. His work helps maintenance engineers and test teams choose safe instruments with performance suited to the signals and environments they actually measure.